The most straightforward way to add novel ringtones to your iPhone would be to purchase them via the iTunes Store application, but this isn’t complimentary. You may create unique ringtones by taking sound recordings from your iPhone’s Playlist on your Mac. Alternatively, you could use the Multitrack program to make tracks from uploaded sound recordings. There are some other methods also that we can use to set a custom ringtone on iPhone, which can be found in the article. This write-up will guide you on how to set a custom ringtone on iPhone, and you will need to scroll down the article carefully to get all the available options to use.
How to Set a Custom Ringtone on iPhone | 6 Easy Steps to Follow
When looking to know how to set a custom ringtone on iPhone without getting help from anyone around, you should understand that there is always a solution available in your phone only. Also, read How to Fix iPhone Vibration Not Working | 6 Best Methods to Try To know all the steps and options that can help to set a custom ringtone on iPhone, please go through the below instructions carefully:
1. Get iTunes
Users of the most latest iPhones rarely get to use iTunes, but they do get to use it to install their personalized ringtones. On a Personal computer or laptop, customers will need to download and install the most recent edition of Apple’s iTunes. iTunes is already loaded and prepared to use on a Mac. This method is perfect on both a Mac and a Desktop Computer. Notify: iTunes for macOS Catalina is not available from Apple. Upon that current update of macOS, this is how to receive personalized ringtones on any iPhone. When you’re using iTunes on Windows or an early model of macOS with iTunes, the techniques in this tutorial will still perform. Also, read How to See Wifi Password on iPhone | Transmitting a Password is Easy
2. Select an Audio File
Users have to have an audio clip to transform and use as a ringtone. Users most likely now know what they’d like to use. Otherwise, proceed ahead and check for anything that interests them. Users are free to use whatever audio clip they come across. The length of chosen ringtone clip should not exceed 40 seconds. Ringtones that are greater than 40 seconds would not be copied to their smartphone by iTunes. Unless the clip is lengthy and you only need to use a portion of it, then a sound processor can chop it down to an acceptable length. You are free to use whatever sound synthesizer you choose. Also, read How to Fix FaceTime Live Photos Not Saving | Diagnose & Fix It Many enjoy the free and open-source Audacity sound processor for audio editing, but it’s a bit complicated for small tasks such as this; therefore, I suggest using mp3cut.net instead. To use this website, visit the “Open file” button and choose the MP3 or other audio file you want to change. When you submit multimedia content, it could also retrieve the audio from them.
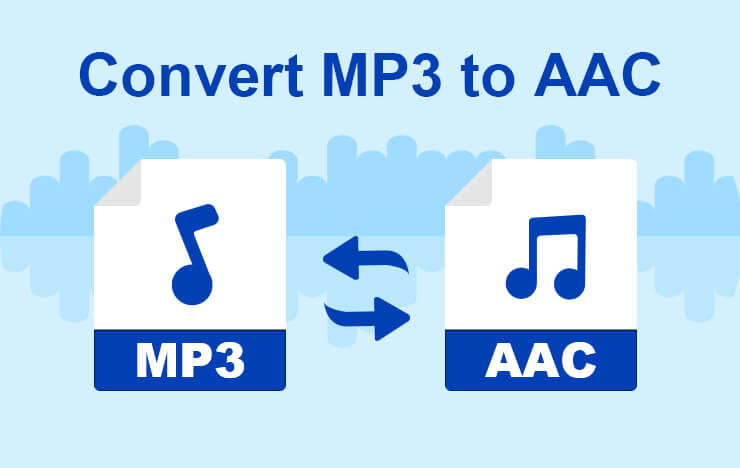
3. Convert the MP3 to AAC
It’s likely that your audio folder is in MP3 form. Using it as a ringtone, you’ll need to change it to AAC form. (We may miss when our audio folder is already in AAC format or has a.m4r filename.)
- To begin, open iTunes and add the audio clip to your collection. It could be accomplished simply by clicking and sliding the item into the iTunes account. After that, search for the files in Collection > Music.
- In iTunes, go to File > Convert > Create AAC Version and choose the audio clip. Also, read How to Delete Photos from iPhone but not iCloud | Save Space & Delete Outdated Photos
4. Change the Name of your AAC File
From your iTunes account, you’ll have 2 versions of the same audio folder: the previous MP3 edition and the updated AAC edition.
- To monitor the effectiveness of which, would be to right-click the collection titles and select the “Type” category from the drop-down menu.
- A fresh “Type” section will appear, indicating which file is which. Your previous MP3 is the “MPEG sound clip,” whereas the “AAC audio file” is the updated AAC folder. When you choose, you may eliminate the MPEG audio file form (which is the MP3) from your collection by right-clicking it.
- You now have an AAC version for your ringtone. Nevertheless, you must modify the filename in order for iTunes to recognize it as a ringtone.
- To commence, drag and drop an AAC file from your iTunes library to your Desktop or another spot on your system.
- The ringtones will be delivered as an AAC files with the.m4a filename. Replace the mp3 name with.m4r. Unless the document’s filename is Song.m4a, for instance, rename it to Song.m4r. Also, read How to Find a Lost iPhone in 2022 | Locate Your Dead iPhone Now
5. Download the Ringtone to Your Phone
Lastly, use the provided Flash drive wired connection your iPhone to your Windows computer is the same connection that you are using to power your iPhone. If you’ve not already linked your cellphone to iTunes on that Windows computer, unlock your cellphone and hit the “Trust” button on its display to verify you would like to assume it. Your personal information number will be required (PIN).
- Choose the device icon to the left of “Store” on the iTunes toolbar.
- In the left sidebar, select the “Tones” box under On My Device.
- Drag and drop the.m4r ringtone clip from its category into iTunes’ Tones folder.
- If dragging and dropping will not really work, try copying and pasting alternatively. In Windows Explorer, choose the ringtone folder and hit Ctrl+C, or right-click it and select copy.
- Then, in iTunes, select inside the Tones list and hit Ctrl+V to paste it. Also, read How to Remove a Device From Apple ID in 2022
6. Select the Ringtone
You could now select your personalized ringtone by configuring > Sounds & Haptics > Ringtone on your iPhone. Any customized sounds you’ve selected will come first in this list. You may also associate the ringtone with a certain contact, so you can tell who’s calling simply by hearing it. Rejoin your smartphone to iTunes and go to the On My Device > Tones category to delete ringtones. To eliminate a tone from your gadget, right-click it and choose “Delete from Collection.” Also, read How to Turn Off Low Data Mode on Your iPhone | Option to Disable Limited Connectivity
Wrapping Up
Hopefully, the article has met the expectations is of such users who look to know how to set a custom ringtone on iPhone. A very good amount of research and testing is involved in the findings for the convenience of customers. Earlier, it was not that easy to set a custom ringtone on iPhone and prompted to ask an expert for help. Now, with the help of this article, I am sure, without anybody’s help, you will be able to know how to set a custom ringtone on iPhone easily.
Δ